Search This Blog

Monday, March 31, 2014

For a baby boy....shower

I recently threw a baby shower for my new little nephew and had so much fun creating the decor for it.  I chose a navy blue and green theme.....(a little hard to find anything blue and green in Seattle these days after the superbowl).


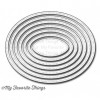
I created a layered banner, cutting the fishtails from my cricut Phrases cartridge.  I scored and folded 1.5 inch and 2 inch rosettes, then topped those with a circle punch and some black alphabet stickers.


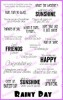
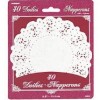
I stamped the napkins in Versafine Smoky Grey ink, with the Showered with Love stamp set from A Muse Studio.  This ink might have been a little too watery for this technique, next time I would use either Memento or Staz On ink for a crisper image.


Lastly, I used these cups with a whale stamp from A Muse Studio and used Inktense pencils with a water color brush, then cut them out and popped them up on a pop dots.

Hope you enjoy these ideas.....happy crafting.

Gina 


Wednesday, March 19, 2014

Spring is in the air.....

Hi everyone,

I'm ready for spring here in the Pacific Northwest, so what better to do, craft a sunny card.  I chose this great stamp Little Blue Button Miss Lily and her Bike Rubber Stamp.


I stamped her on watercolor cardstock with Stazon Black Ink and colored her with distress markers, then blended with a watercolor brush.  I added some grass under her feet to keep her a little grounded.


On the inside of the card, I stamped the Little Blue Button Miss Lily and her Bike Rubber Stamp in a light green ink and stamped a sentiment from AmyR Stamps Rainy Day Sentiments Rubber Stamps


To finish off this card, I added some clear wink of stella to the dark green cloud and some Distressed Stickles, Clear Rock Candy to the yellow clouds, then added some flowers and leaves from my stash.

\

Hope you enjoy, have a great day and Happy Crafting.

Go check out all the new April released digi and rubber stamps over at Little Blue Button: April 2014 rubber and digi stamps release, they are just beautiful you won't want to miss out on getting a jump start on your spring and easter creations.

Gina


Sunday, March 16, 2014

Happy St. Patrick's Day Eve....

Happy Sunday to you all....

Wanted to share a little project I made for St. Patrick's Day, using the new Little Blue Button Stamps: Miss Lilly Shamrock.


I used prismacolor pencils to color in Little Blue Button Stamps: Miss Lilly Shamrock and then blended the color out with odorless mineral spirits.


I cut this cute little box with my Cricut and added some ribbon and white embossed shamrocks that I covered in stickles.


Hope you all have a great St. Patrick's Day......enjoy!

Gina


Monday, March 10, 2014

A Big "Hello".......

Hello there..... I am so excited to announce that I am a new design team member to Little Blue Button Stamps and am so happy to be a part of this fantastically talented team.

For my first submission to the design team, I couldn't resist the new little Miss Lilly Coffee Break as I envisioned her with a bright dress.....so here she is in all her pink glory.


First I colored her with copics, then I paper pieced her dress and cut her out.  I used the new Lawn Fawn speech bubble die and scripty hello die cut out of adhesive backed glitter foam.  I added some flower punches and popped her up on some foam adhesive.


On the inside I water colored a large latte cup stamp made by a local company here to me in Seattle called Impress Rubber stamps, then I stamped the image from this stamp, "Thanks a latte", thought this would be perfect.

Since it's been pretty rainy here in Seattle it's nice to add some spring colors to brighten things up.


Hope you  enjoy this and get some good ideas on how to use this adorable Miss Lilly Coffee Break.

Head on over to Little Blue Button Stamps to check her out, plus lots of  other great newly released images, or over to CC Designs Stamps to get as a rubber stamp.

Plus check out all the great talent on the Little Blue Button Stamps Design Team.

Happy stamping........have a great week.

Friday, February 28, 2014

Turning 3.........thank you

Morning........

My son recently turned 3 years old earlier this month and I created some thank you notes to send to my family and friends, since he is really into cars right now, I thought this CC Designs car image was perfect.


I copic colored these little cars from CC Designs.  The stamped tags are from Stampin' Up as well as the label punch too.


Then I cut a few flag banners all at different random lengths out of some My Minds Eye: Boy Crazy paper.


Then on the inside I added some more patterned paper and a picture of my son in our most recent snow fall here in the northwest and then stamped a sentiment from Lawn Fawn's Grand Greetings.


I made 8 in total and making these cards so clean and simple made it that much easier to mass produce.  Hope you enjoy these cards.

Happy Crafting.


Tuesday, February 4, 2014

DT call Little Blue Button Stamps 2014

A new venture, the world of Design Teams.  I am so excited to be submitting my work for Little Blue Button Stamps.

I am in awe of the images that they create and would be so honored to be a part of this great company.

So here are a few of my most favorite cards.


Hope you enjoy these cards. Have a great night.

Monday, February 3, 2014

Just another "love note".........

Happy February everyone, while it was raining 'green and blue' here in Seattle yesterday, I was creating a little love note!


I used this sweet image Swiss Miss Rosalie from C.C. Designs and colored her with Prismacolor pencils and blended the colors together using a blending stump and odorless mineral spirits, a technique I learned from Amy Rysavy.  The technique is a little like water coloring, but it's a little more controlled I feel like and you can use a thick 100# cardstock and the paper won't break down at all.


So the stencil I used was 6x6 Polka Dot from Heidi Swapp and I tinted some Martha Stewart white texture paste with a red faber castelle gelato.  I just mixed together a little of the gelato and paste and then wiped it right over the stencil.  It dried pretty quickly so I didn't have to wait long and I think it turned out great, made it look a little like stucco, but kind of a cool effect.

To assemble the card, I ran some Lifestyle Crafts heart dies through my cuttlebug, added a bow and sentiment from Just a Love Note (designed by Kristina Werner) , then used a Clear Wink of Stella Glitter Brush Pen on the three little hearts.


On the inside of the card, I just used some of the remaining die cut hearts and stamped another sentiment from Just a Love Note (designed by Kristina Werner).

And that finishes off this card, hope you like it.  Leave a comment and let me know what you think or if you have any questions send me an email.

Have a great day. =)